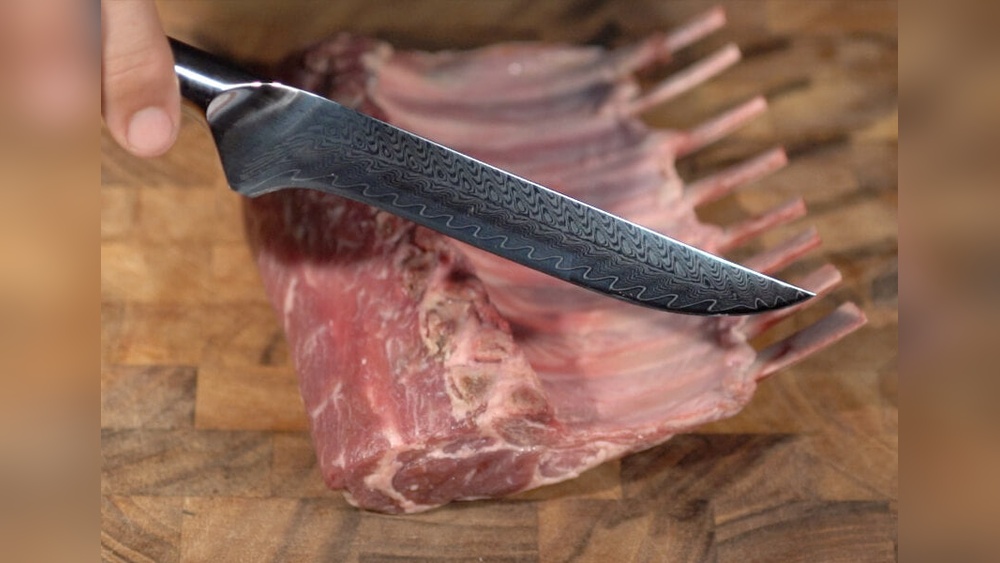
A boning knife is not just another kitchen tool, it’s a specialist’s choice, designed for precision. Whether you’re breaking down a chicken, trimming fat from a roast, or filleting fish, the boning knife makes these tasks faster and more accurate. Yet, many home cooks and even some professionals overlook its advantages, reaching for a chef’s knife instead. By learning how to use a boning knife properly, you can save time, reduce waste, and create cleaner cuts. This guide will show you not just the basics, but the small details that separate average results from professional-level performance.
What Is A Boning Knife?
The boning knife is a slender, pointed knife, usually between 5 and 7 inches long. Unlike a chef’s knife, it features a narrow, slightly curved blade that tapers to a sharp point. This design allows you to get close to bones and joints, making it ideal for separating meat from bone, removing skin, and shaping cuts.
There are two main types:
- Flexible boning knife: Best for poultry and fish, where delicate movements are needed.
- Stiff boning knife: Preferred for larger cuts of meat like beef or pork, as it gives more control and force.
Some modern boning knives also come with semi-flexible blades, which offer a balance between control and flexibility.
Why Use A Boning Knife Instead Of A Chef’s Knife?
Using a chef’s knife for everything is common, but it’s not always the best choice. The boning knife offers advantages that a chef’s knife cannot:
- Precision: The narrow blade can get into tight spaces around bones and joints.
- Less Waste: You can remove more meat and produce cleaner cuts.
- Safety: The shape allows for more control, reducing slips.
Here’s a comparison to show how boning knives differ from other common kitchen knives:
| Knife Type | Blade Length | Blade Shape | Main Use |
|---|---|---|---|
| Boning Knife | 5, 7 in | Narrow, pointed, curved | Separating meat from bone, filleting |
| Chef’s Knife | 8, 10 in | Wide, curved edge | Chopping, dicing, general prep |
| Paring Knife | 3, 4 in | Short, straight | Peeling, small detail work |
Pro Tip: If you often work with whole birds or large cuts of meat, a boning knife will make your prep faster and your results neater.
Choosing The Right Boning Knife
Selecting the best boning knife for your needs is essential. Here are the main factors to consider:
Blade Flexibility
- Flexible blades: Great for fish and poultry. They move along bones and under skin easily.
- Stiff blades: Better for beef, pork, and dense meats where you need to apply more force.
Blade Length
Most boning knives are 5, 7 inches. Shorter blades offer more control for delicate work; longer blades are better for big cuts.
Handle Comfort
Look for a handle that fits your grip and feels balanced. Non-slip materials (like rubber or textured plastic) are helpful if your hands get wet or greasy.
Material
High-carbon stainless steel is popular because it holds a sharp edge and resists rust. Some premium knives use Japanese steel for extra sharpness and precision.
Price Vs. Quality
You don’t need to buy the most expensive knife, but avoid very cheap models. A good boning knife should feel sturdy, not flimsy.
Here’s a quick comparison of key features:
| Feature | Why It Matters | What to Look For |
|---|---|---|
| Flexibility | Adapts to different meats | Choose based on your main use |
| Length | Controls precision and reach | 5, 6 in for poultry, 7 in for big cuts |
| Handle | Affects grip and safety | Comfortable, non-slip |
| Blade Material | Stays sharp, resists rust | High-carbon stainless steel |
How To Hold A Boning Knife For Maximum Control
Before you make your first cut, it’s important to learn how to hold the boning knife properly. This affects both your safety and the quality of your work.
- Pinch grip: Hold the blade between your thumb and the side of your index finger, with your other fingers wrapped around the handle. This gives you more control over the tip and edge.
- Finger placement: Keep your index finger curled slightly on the spine (top) of the blade for guidance, but never rest it too close to the tip.
- Firm but relaxed: Don’t grip too tightly. A relaxed hand gives better control and less fatigue.
Pro Tip: Practice holding the knife without cutting to get comfortable with the balance and weight. The right grip makes a big difference when working around bones.
Essential Techniques For Using A Boning Knife
Mastering a boning knife is about understanding both the knife and the meat. Here are the main techniques to practice:
1. Removing Skin From Meat Or Fish
- Hold the boning knife at a slight angle.
- Start at one edge of the skin, gently sliding the blade between the skin and the flesh.
- Use a smooth, sawing motion; don’t force the knife.
- Pull the skin with your free hand for tension.
Example: When skinning a salmon fillet, insert the blade just above the tail and work slowly toward the head, keeping the blade almost flat.
2. Deboning Poultry
- Locate the joints with your fingers first.
- Make small, precise cuts to expose the bones.
- Use the tip of the knife to cut around the bone, not through it.
- Gently scrape the meat away from the bone with the side of the blade.
Pro Tip: For chicken thighs, keep the blade close to the bone to avoid wasting meat.
3. Trimming Fat And Silver Skin
- Place the blade just under the layer of fat or silver skin.
- Angle the knife upward, away from the meat, to avoid cutting off too much.
- Use short, gentle strokes.
When I tested this on a pork tenderloin, the difference was clear: trimming with a boning knife left more meat intact and made for a cleaner presentation.
4. Filleting Fish
- Insert the tip behind the gills and cut down to the backbone.
- Glide the blade along the bones, separating the fillet in one motion.
- Use the flexible blade to follow the natural curve of the fish.
5. Frenching Rib Bones
- Cut around the ends of the rib bones (like on a rack of lamb).
- Use the tip to scrape away meat, fat, and connective tissue.
- The result: Clean, exposed bones for an elegant look.
Each of these techniques requires practice, but the right knife makes a noticeable difference.
Step-by-step: Deboning A Chicken Thigh
Let’s go through a common kitchen task: removing the bone from a chicken thigh. This step-by-step guide will help you master the basics.
- Place the thigh skin-side down on a clean cutting board.
- Identify the bone by feeling along the center.
- Make a shallow cut along the length of the bone to expose it.
- Use the tip of the knife to cut around the bone, staying as close as possible.
- Lift the bone slightly and continue cutting underneath to free it from the meat.
- Trim any remaining cartilage or fat with short, careful strokes.
Example: For stuffed chicken thighs, a clean deboning job makes rolling and filling much easier.

Credit: www.youtube.com
Safety Tips When Using A Boning Knife
Sharp knives are safer than dull ones, but only if used correctly. Here are essential safety tips:
- Keep the blade sharp: A dull knife requires more force and is more likely to slip.
- Cut away from your body: Always direct the blade away from your hand and fingers.
- Stabilize your cutting board: Place a damp towel underneath to prevent slipping.
- Use slow, controlled movements: Rushing increases the risk of injury.
- Store properly: Use a knife block or sheath to protect both the blade and your hands.
Pro Tip: Never try to cut through bone with a boning knife. Use a cleaver or heavy-duty knife for that task.
Common Mistakes Beginners Make
Even experienced cooks can misuse a boning knife. Here are mistakes to avoid:
- Using the wrong type of boning knife: A stiff blade for fish, or a flexible blade for beef, will make the job harder.
- Applying too much force: Let the sharpness of the knife do the work.
- Not following the bone: Cutting straight through meat wastes product and damages the blade.
- Improper grip: Holding the handle too tightly or too loosely leads to loss of control.
- Neglecting to sharpen: A dull knife is both inefficient and dangerous.
These errors can add minutes to your prep and reduce the quality of your cuts.
Maintaining And Sharpening Your Boning Knife
A well-cared-for boning knife can last many years. Here’s how to keep it in top shape:
Cleaning
- Wash by hand with warm, soapy water after each use.
- Dry immediately to prevent rust.
- Avoid dishwashers; harsh detergents and heat can damage the blade and handle.
Sharpening
- Use a honing steel before each use to maintain the edge.
- Sharpen with a whetstone or professional service when the blade no longer cuts easily.
- For most home cooks, sharpening every 2, 3 months is enough, depending on use.
Storage
- Store in a knife block, magnetic strip, or blade guard.
- Avoid tossing it into a drawer, where it can get damaged or cause injury.
Pro Tip: Regular maintenance is easier than fixing a very dull or damaged blade.
Boning Knife Vs. Fillet Knife: What’s The Difference?
Many people confuse these two knives, but they serve different purposes. Here’s a breakdown:
| Feature | Boning Knife | Fillet Knife |
|---|---|---|
| Blade Flexibility | Stiff to semi-flexible | Very flexible |
| Blade Length | 5, 7 in | 6, 11 in |
| Best For | Meat, poultry, some fish | Fish, delicate filleting |
| Blade Shape | Narrow, pointed | Thinner, longer, more curved |
Pro Tip: If you mostly prepare fish, a fillet knife may be the better choice. For general meat prep, a boning knife is more versatile.

Credit: cutleryandmore.com
When Should You Use A Boning Knife?
The boning knife is a specialist, but it appears more often than you might expect. Here are situations where it shines:
- Breaking down whole chickens or turkeys
- Trimming fat or silver skin from beef or pork roasts
- Removing bones from fish fillets
- Frenching racks of lamb or pork
- Preparing cuts for stuffing or roulades
In my experience, using the right knife for each job speeds up prep and gives more professional results.
Advanced Uses And Non-obvious Tips
Beyond basic meat prep, the boning knife has a few hidden talents:
- Butterflying: Slice a thick cut of meat (like pork chops) almost in half for stuffing. The narrow blade gives more control than a chef’s knife.
- Peeling tough-skinned fruits: The sharp tip can help remove mango or melon skin with less waste.
- Removing seeds from peppers: The pointed blade fits inside to scoop out seeds with minimal damage to the flesh.
Pro Tip: For small game or birds, a flexible boning knife can help remove bones without tearing delicate skin.

Credit: www.seriouseats.com
How To Practice And Improve Your Skills
The more you use a boning knife, the more comfortable you’ll become. Here are ways to build your skills:
- Practice on inexpensive meats: Start with chicken thighs or drumsticks before moving to expensive cuts.
- Watch expert videos: Visual demonstrations can help clarify grip and motion.
- Join a butchery class: Hands-on instruction can speed up learning and correct bad habits.
Example: When I first learned to debone chicken thighs, it took several tries to avoid leaving meat on the bone. With practice, the process became quicker and cleaner.
Responsible Use And Food Safety
Always follow safe food handling practices:
- Wash hands and surfaces before and after handling raw meat.
- Use separate boards and knives for raw meat and other foods.
- Disinfect your boning knife after each use, especially when switching between different types of meat.
According to the USDA, proper cleaning reduces the risk of cross-contamination and foodborne illness (USDA Food Safety).
Frequently Asked Questions
What’s The Best Way To Sharpen A Boning Knife?
For most home cooks, a whetstone provides the sharpest edge. Hold the knife at a 15-20 degree angle and move it evenly across the stone. If you’re unsure, a professional sharpening service can restore the blade without risk of damage.
Can I Use A Boning Knife For Vegetables Or Bread?
A boning knife is not ideal for dense vegetables or bread. Its narrow blade can get stuck or cause uneven cuts. Use it for meat, fish, and delicate tasks, choose a chef’s knife or serrated bread knife for other foods.
How Often Should I Replace My Boning Knife?
With proper care, a quality boning knife can last for years. Signs you need a new one include a permanently dull blade, rust, or a loose handle. If the knife no longer feels safe or effective, it’s time to upgrade.
Why Does My Boning Knife Rust Even When I Wash It?
High-carbon steel knives can rust if left wet or not dried immediately. Always dry your knife by hand and avoid leaving it in a sink or dishwasher. If rust appears, use a gentle scrub and oil the blade lightly after cleaning.