A sharp knife makes cooking more enjoyable and safer. When your knife is dull, you need to use more force, and it can slip, leading to accidents. Sharpening your knife with a whetstone is one of the best ways to get a razor-sharp edge, but many people find the process confusing or intimidating. In reality, with the right guidance, anyone can learn how to sharpen a knife on a whetstone and keep their blades in perfect shape for years.
This guide explains every step, from choosing your stone to finishing your edge. You’ll find answers to common problems, discover tips that beginners often miss, and see real-life examples to help you succeed. Whether you use your knives for home cooking, outdoor activities, or professional work, learning this skill is worth the effort.
Why Use A Whetstone?
A whetstone (sometimes called a sharpening stone) is a flat block, usually made from natural or synthetic materials, that sharpens the edge of a blade. Unlike pull-through sharpeners or electric devices, whetstones offer more control and can restore even very dull or damaged knives.
Benefits Of Using A Whetstone
- Precision: You control the sharpening angle and pressure, resulting in a better edge.
- Versatility: Whetstones work for almost any knife type, kitchen, pocket, or outdoor.
- Edge Quality: A properly sharpened knife on a whetstone can become sharper and stay sharp longer than with other methods.
- Cost Effective: With good technique, a whetstone can maintain your knives for many years.
I once tried a pull-through sharpener on a quality chef’s knife, and the edge became uneven and rough. When I switched to a whetstone, I could restore the original smoothness and sharpness, and the knife performed much better.
Understanding Whetstone Types And Grits
Choosing the right whetstone is essential for good results. Whetstones come in different materials and grit levels, and each serves a specific purpose.
Types Of Whetstones
- Water Stones: Most popular for kitchen knives. Use water as lubricant, easy to clean, and quick to cut.
- Oil Stones: Use oil as lubricant. They cut slower but last longer.
- Diamond Stones: Made with a metal base and diamond abrasive. Very durable and fast-cutting, but more expensive.
Grit Levels Explained
Grit refers to the coarseness or fineness of the stone’s surface. Lower numbers mean coarser stones; higher numbers are finer.
| Grit Range | Purpose | Common Use |
|---|---|---|
| 200, 400 | Coarse | Repair chips, reset very dull edges |
| 800, 1000 | Medium | Basic sharpening, regular maintenance |
| 3000, 6000 | Fine | Polishing, refining the edge |
Most home cooks only need a medium (1000) and a fine (3000, 6000) stone. Coarse stones are useful if your knife is very dull or has small chips.
Synthetic Vs. Natural Stones
- Synthetic stones are consistent, affordable, and easy to find.
- Natural stones can give a unique finish but are less predictable and more expensive.
For beginners, synthetic water stones offer the best balance of performance and ease.
Preparing Your Tools And Workspace
Before sharpening, gather everything you need and set up your area safely.
What You Need
- Knife: Clean and dry
- Whetstone(s): At least one, ideally two (medium and fine grit)
- Stone holder or damp towel: To keep the stone from slipping
- Container of water: For soaking and rinsing the stone (if using water stones)
- Cloth or towel: For drying hands and tools
Setting Up
- Place the whetstone on a stable surface. Use a stone holder or a damp towel underneath to prevent movement.
- Soak water stones for 10, 15 minutes, unless the manufacturer says otherwise. Diamond and oil stones do not need soaking, but oil stones require a little honing oil.
- Keep your workspace clear and dry. Wet hands or a slippery surface can be dangerous.
Warning: Never use a whetstone on an unstable or uneven surface. A stone that moves can cause you to lose control and cut yourself.
How To Hold Your Knife And Find The Correct Angle
One of the most important aspects is maintaining a steady angle. The ideal angle for sharpening kitchen knives is 15, 20 degrees, but the exact angle depends on your knife type.
Finding The Right Angle
- Western kitchen knives: 18, 20 degrees per side
- Japanese knives: 12, 15 degrees per side
To estimate 20 degrees, stack two pennies at the spine of your knife, and tilt until the gap matches.
How To Hold The Knife
- Hold the knife handle with your dominant hand.
- Place your index finger on top of the blade for control.
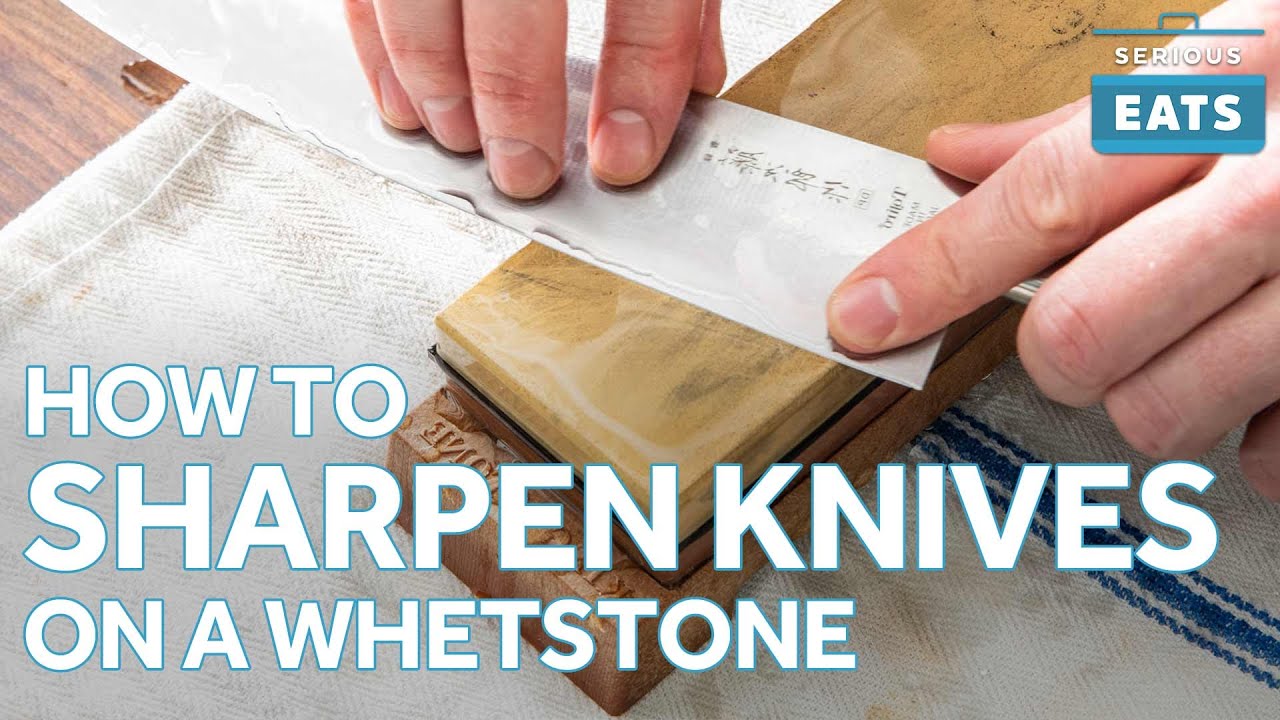
- With your other hand, gently press the blade’s flat side onto the stone.
Pro Tip: Consistency is more important than a perfect angle. It’s better to keep the same angle throughout than to keep adjusting.

Credit: www.thespruceeats.com
Sharpening Process: Step-by-step
Now you’re ready to start sharpening. Here’s a clear guide to each stage.
1. Soak The Stone (if Using Water Stone)
Submerge the stone in water for 10, 15 minutes. When bubbles stop rising, it’s soaked enough. If you hear a dry, scratching sound while sharpening, add water as needed.
2. Position The Knife
Lay the knife across the stone at your chosen angle (15, 20 degrees). Start with the heel (base) of the blade touching the stone. Face the edge away from you.
3. Sharpen The First Side
Push the blade away from your body, sliding from heel to tip, keeping steady pressure and angle. Use the full length of the stone.
- Apply gentle, even pressure, think of spreading peanut butter.
- Repeat 8, 12 times, or until you feel a slight roughness (burr) on the opposite side.
4. Flip And Sharpen The Other Side
Turn the knife over and repeat the motion, pulling the blade toward you this time. Match the number of strokes.
5. Alternate Sides
Once a burr appears on both sides, alternate strokes, one on each side, for 6, 8 passes. This helps refine and center the edge.
6. Progress To Finer Grits
If you have more than one stone, move to the next finest grit and repeat steps 2, 5. Each finer stone polishes and sharpens the edge further.
7. Rinse And Dry
When finished, rinse the knife and stone with water, dry both completely, and clean your work area.
8. Test The Sharpness
Carefully check your edge by slicing a piece of paper. A sharp knife should cut smoothly with little force. You can also try shaving a thin layer from a tomato or onion.
Example: When I sharpen my chef’s knife, I start with a 1000 grit stone, then finish on a 6000 grit. Afterward, the knife glides through ripe tomatoes without crushing them.
Honing Vs. Sharpening
Many people confuse honing and sharpening, but they are different steps in knife care.
- Sharpening removes metal to create a new edge. Use a whetstone for this.
- Honing straightens the existing edge without removing much metal. Use a honing rod (steel or ceramic).
Sharpen your knife only when it’s dull (maybe every few months for home cooks), but hone regularly, ideally before each use. Honing extends the time between sharpening sessions.
Common Mistakes And How To Avoid Them
Even with good instructions, beginners often make a few key errors. Avoiding these will help you get better results.
1. Wrong Angle
Changing the angle during sharpening leads to a wavy or dull edge. Practice keeping your wrist steady, or use angle guides for consistency.
2. Too Much Pressure
Pressing hard can remove too much metal and damage the blade. Gentle, even pressure is best.
3. Not Using Enough Water (for Water Stones)
A dry stone scratches and wears down quickly. Always keep the surface wet.
4. Incomplete Sharpening
Stopping before a burr forms means your edge isn’t fully sharpened. Be patient, wait for the burr before moving to the next side or grit.
5. Skipping Fine Grits
Finishing on a coarse stone leaves a rough, weak edge. Always polish with a finer stone if possible.
How Often Should You Sharpen Your Knife?
How often you sharpen depends on how you use your knife.
| Usage Frequency | Sharpening Interval |
|---|---|
| Home cook (daily use) | Every 2, 3 months |
| Professional chef | Monthly or more |
| Casual use (once a week) | Every 6 months |
Hone your knife more often, before or after each use, to maintain sharpness longer. If your knife starts to slip or crush food instead of slicing cleanly, it’s time to sharpen.
Credit: www.youtube.com
Choosing The Right Whetstone For Your Knife
Not all knives and whetstones are a perfect match. Consider your blade’s type and steel hardness.
Knife Type And Edge Angle
- Japanese knives (hard steel, thin edge): Use finer grits (3000, 8000) for a polished finish.
- Western knives (softer steel, thicker edge): Medium and fine grits (1000, 3000) work well.
Whetstone Grit And Knife Condition
- Use coarse stones (200, 400 grit) only for damaged or very dull knives.
- For regular maintenance, a 1000/3000 combo stone is ideal.
- Polishing stones (6000, 8000) are great for finishing but not required for daily kitchen use.
Durability And Cost Comparison
| Stone Type | Durability | Cost | Maintenance |
|---|---|---|---|
| Water Stone | Medium | Low to Moderate | Needs flattening |
| Oil Stone | High | Moderate | Easy |
| Diamond Stone | Very High | High | Minimal |
Pro Tip: If you want a simple start, a double-sided 1000/6000 grit water stone is enough for most home cooks.
Caring For Your Whetstone
A well-cared-for whetstone lasts much longer and works better.
Cleaning
After each use, rinse the stone with water and scrub gently with a brush to remove metal particles. Never use soap on natural stones.
Flattening
Over time, stones develop grooves and become uneven. Use a flattening stone or a piece of coarse sandpaper on a flat surface to restore the flatness every few months.
Storage
Let stones dry fully before storing to prevent mold and cracks. Store in a cool, dry place.
Sharpening Specialty Knives
Some knives need special care. Here’s how to approach them:
Serrated Knives
Do not use a flat whetstone. Use a special rod-shaped sharpener that matches the serration size.
Cleavers
Heavier, thicker blades require a slightly higher angle (20, 25 degrees) and coarser grits for best results.
Pocket And Outdoor Knives
Same basic process, but use smaller stones for portability. Adjust the angle based on the knife’s purpose (e. g. , 20 degrees for durability).
How To Tell When Your Knife Is Sharp Enough
Many people over-sharpen, wasting effort and wearing out their knives. Use these tests to judge your edge.
The Paper Test
Hold a piece of paper upright and slice downward. A sharp knife should cut smoothly with little resistance.
Tomato Or Onion Test
Try slicing a ripe tomato or onion. If the knife glides through without crushing, the edge is good.
Fingernail Test
Very gently rest the edge on your fingernail. A sharp knife will bite and not slide off. Be careful with this method.
Warning: Never test a knife’s sharpness on your skin. Small slips can cause serious injury.

Credit: www.foodandwine.com
Practical Tips For Better Results
Here are a few insights that can make a big difference, especially for beginners.
- Use the whole stone surface: This prevents uneven wear and helps keep your stone flat.
- Count your strokes: Do the same number on each side to maintain symmetry.
- Wipe the blade between grits: This avoids carrying coarse grit to your fine stone.
- Check the burr: Learning to feel the burr is key to knowing when to switch sides.
- Don’t rush: Take your time and focus on control rather than speed.
In my experience, practicing slowly with a cheap knife first helps build confidence before moving to expensive blades.
When To Seek Professional Help
Some knives are expensive, sentimental, or damaged beyond what you feel comfortable fixing. If your knife is chipped, bent, or has a complex edge, consider taking it to a professional sharpener. This is especially true for Japanese knives or blades with special geometry.
Recommended Resources For Further Learning
If you want to go deeper, many reputable resources offer detailed guides and videos. One trusted site for knife sharpening and maintenance is the Chef’s Knife Magazine.
Frequently Asked Questions
How Do I Flatten My Whetstone?
Over time, your whetstone will develop grooves from repeated use. To flatten it