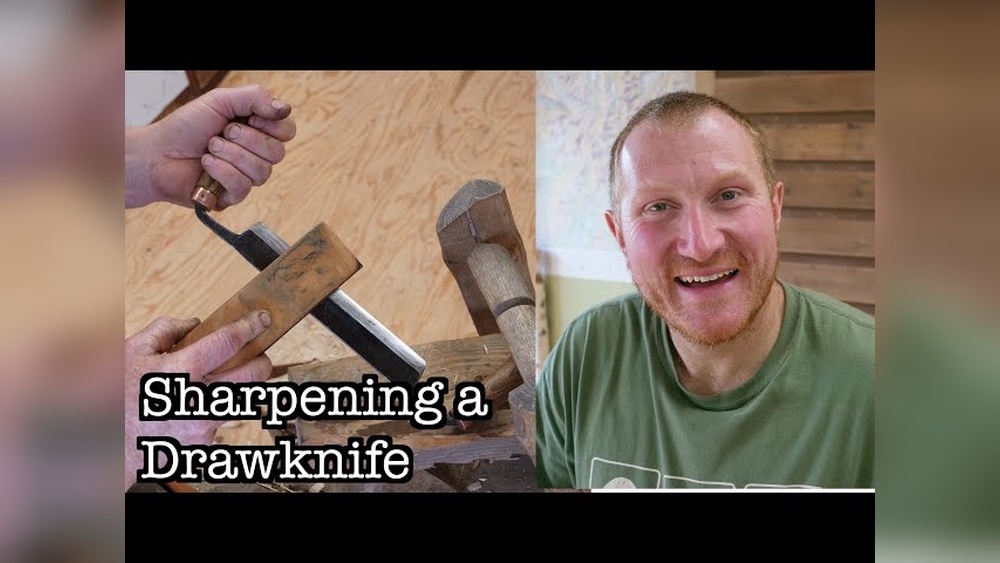
Sharpening a draw knife might sound like a job for experts, but with the right method, anyone can do it. A sharp draw knife makes woodworking safer, faster, and more enjoyable. Whether you use your draw knife for carving, debarking, or shaping wood, keeping it sharp is essential.
Dull blades make your hands work harder and can even cause accidents. This guide will help you understand every step of sharpening a draw knife, so you get smooth, precise cuts every time. You’ll learn which tools to use, how to avoid common mistakes, and a few professional tips that even seasoned woodworkers sometimes miss.
Understanding The Draw Knife
A draw knife is a traditional woodworking tool with a long, straight or slightly curved blade and a handle at each end. Its unique design lets you pull the blade toward you, shaving off thin layers of wood. This tool is popular for shaping chair legs, debarking logs, and many green woodworking tasks. The angle of the blade and the way you use it both affect how sharp it needs to be.
Why Sharpness Matters
A sharp draw knife slices wood easily, producing clean shavings. When the blade is dull, you need more force, which can lead to slips and injuries. Dull knives also tear the wood instead of cutting it, leaving rough surfaces. Regular sharpening keeps your tool in top shape and helps you work efficiently.
Types Of Draw Knife Blades
Draw knives come with different blade shapes and sizes. Most have a beveled edge (single or double bevel) that must be maintained at a specific angle. The material of the blade, usually high-carbon steel, affects how you sharpen it and how long the edge stays sharp.
| Blade Type | Typical Use | Sharpening Approach |
|---|---|---|
| Straight | General shaping, long cuts | Flat stone or file |
| Curved | Concave surfaces, chair seats | Round stone or slipstone |
| Beveled (single) | Standard woodworking | Maintain original bevel angle |
| Beveled (double) | Heavy-duty, rough work | Sharpen both sides equally |
Tools And Materials Needed
Gathering the right tools before starting makes sharpening smooth and safe. Not all sharpening tools work for every blade, so choose those that match your draw knife’s shape and condition.
- Sharpening stones: Whetstones or diamond stones in different grits (coarse, medium, fine)
- Files: Flat mill files for reshaping badly worn edges
- Honing guides: Optional, but helpful for maintaining a consistent angle
- Strop: Leather strop or stropping compound for final polishing
- Clamps or vise: To hold the draw knife steady while you work
- Protective gloves: To protect your hands from slips
- Lubricant: Water or honing oil for stones
Pro Tip: For curved draw knives, a slipstone or small round stone helps reach every part of the edge.
Comparing Sharpening Tools
Each sharpening tool has strengths and weaknesses. Here’s a quick comparison to help you choose:
| Tool | Best For | Drawbacks |
|---|---|---|
| Whetstone | Fine, consistent edge | Can wear unevenly, needs flattening |
| Diamond stone | Fast material removal, stays flat | More expensive |
| File | Badly damaged or chipped edges | Leaves rougher finish, needs follow-up honing |
| Strop | Polishing and final sharpness | Doesn’t remove nicks or reshape edge |

Credit: inthewoodshop.com
Preparing The Draw Knife
Before sharpening, inspect your draw knife carefully. Look for nicks, chips, or rust on the blade. Cleaning the tool makes sharpening easier and protects your stones.
- Clean the blade: Use a rag and a bit of oil to remove dirt, sap, or rust. For stubborn rust, use fine steel wool.
- Check the edge: Hold the blade to the light. If you see shiny spots, those are dull areas.
- Secure the tool: Clamp the draw knife in a vise with the bevel facing up. Make sure it’s stable, movement can cause mistakes or injury.
If the blade has serious damage (deep chips or bends), start with a file to restore the basic shape before moving to finer sharpening.
Setting The Correct Sharpening Angle
One common mistake is sharpening at the wrong angle. Most draw knives have a bevel angle between 20 and 25 degrees. Keeping this angle is crucial. A steeper angle makes the edge strong but less sharp. A shallower angle gives a razor edge but can chip easily.
If you’re unsure, check the manufacturer’s guidelines or match the existing bevel. Use a marker to color the bevel edge; as you sharpen, the marker disappears where you make good contact. This trick helps you maintain the right angle.
Step-by-step Sharpening Process
Now, let’s walk through each step to sharpen your draw knife safely and effectively.
1. Coarse Sharpening (if Needed)
If your blade is very dull or damaged, start with a coarse stone or file.
- Use the file: Hold the file flat against the bevel. Push along the bevel, following its angle. Work evenly from one end to the other.
- Check progress: After a few passes, check for a consistent edge. Don’t file too much, you can’t put steel back once it’s gone.
Warning: Filing removes more material. Only use it when necessary.
2. Medium Grit Sharpening
Switch to a medium grit stone (about 1000 grit).
- Lubricate the stone: Use water or oil as recommended by the stone’s maker.
- Sharpen the bevel: Hold the stone flat against the bevel and move it in small circles or straight strokes, always following the blade’s angle.
- Work both sides: If your draw knife has a double bevel, flip it and repeat. For single bevels, just remove the burr (a thin wire edge) from the flat side.
In my experience, using a medium grit stone is where most of the edge returns. Take your time; rushing here leaves the blade uneven.
3. Fine Grit Sharpening
Move to a fine stone (3000 grit or higher) for a razor-sharp edge.
- Repeat the motion: Use even less pressure and focus on smooth, light strokes.
- Check the burr: A tiny burr should form on the opposite side. This means the edge is sharp enough to proceed.
4. Honing And Stropping
Honing refines the edge, while stropping polishes it to a mirror finish.
- Hone the bevel: Use a honing guide for steady hands, or freehand if you’re confident. Move the blade back and forth lightly.
- Strop the edge: Drag the edge across a leather strop, away from the cutting edge. Apply stropping compound for best results. Do this several times to remove any remaining burr and polish the blade.
Pro Tip: Stropping is often skipped, but it makes a big difference. A stropped draw knife stays sharper longer and glides through wood.
Testing The Sharpness
Don’t trust your eyes alone. Test the sharpness by:
- Shaving wood: Try the knife on a scrap piece. It should produce thin, even shavings.
- Shaving hair: Carefully see if it shaves hair from your arm (be cautious! ).
- Paper test: Slice through a sheet of paper. A sharp draw knife will cut cleanly.
If the edge pulls or snags, repeat the fine grit and stropping steps.
Common Sharpening Mistakes To Avoid
Even experienced users make mistakes that shorten a tool’s life or leave it less sharp than it should be. Here are some pitfalls to avoid:
- Using too steep or too shallow an angle: This changes how the knife cuts and weakens the edge.
- Pressing too hard: Heavy pressure can round the edge or wear away too much steel.
- Ignoring the burr: Failing to remove the burr leaves a weak, jagged edge.
- Skipping stropping: This step is often missed, but it adds sharpness and life to your tool.
- Uneven sharpening: Sharpening one side more than the other makes the blade cut unevenly.
Maintaining Your Draw Knife Edge
Sharpening isn’t a one-time job. Regular maintenance keeps your draw knife ready for any task.
- Strop often: Light stropping after each use keeps the edge keen.
- Clean the blade: Remove sap or resin right after use to prevent rust.
- Store properly: Keep the draw knife dry and in a sheath if possible.
- Touch up with a fine stone: Before each major project, give the blade a few strokes on a fine stone.
Pro Tip: If you’re working with particularly hard or abrasive wood, check the edge more often. Some woods dull tools faster than others.

Credit: www.youtube.com
Advanced Tips For Experienced Woodworkers
Once you’re comfortable with the basics, consider these advanced tips:
- Micro-bevels: Adding a tiny secondary bevel (1, 2 degrees steeper) can strengthen the edge without losing sharpness.
- Convex edges: Some woodworkers prefer a slightly rounded, convex edge for extra durability. This takes practice but can make the knife less likely to chip.
- Custom handles: Adjusting the handle angle or shape can change how you hold the blade while sharpening, giving you better control.
Example: Some green woodworkers use a convex bevel for shaping hardwoods, while a straight bevel works best for softwoods.
When To Replace Or Reprofile The Blade
No blade lasts forever. If your draw knife is badly chipped, bent, or has lost too much metal, it may be time to reprofile or replace it.
- Reprofiling: Use a coarse file to reshape the edge and restore the correct bevel. This is a last resort and should be done carefully.
- Replacement: If the blade is too thin or cracked, consider buying a new draw knife. A damaged blade is dangerous and can’t be fixed with sharpening alone.

Credit: inthewoodshop.com
Safety Precautions
Sharpening tools can be risky if you’re not careful. Protect yourself by:
- Wearing cut-resistant gloves
- Clamping the draw knife securely
- Always pushing or pulling the sharpening tool away from your body
- Keeping your workspace clear of distractions
Warning: Never test a blade’s sharpness on your skin unless you’re sure it’s safe, use wood or paper instead.
Environmental Factors And Sharpening
Where and how you store and use your draw knife affects its sharpness.
- Humidity: High humidity can cause rust. Store your tools in a dry place and oil the blade lightly after sharpening.
- Temperature: Extreme cold can make steel more brittle. Handle with care in winter.
- Wood Type: Resinous woods can gum up the edge. Clean the blade immediately after use.
Comparing Draw Knife Sharpening To Other Tools
Sharpening a draw knife is different from sharpening chisels or plane irons. Here’s a quick look at the differences:
| Tool | Sharpening Angle | Sharpening Difficulty | Typical Use |
|---|---|---|---|
| Draw Knife | 20, 25° | Moderate (requires angle control) | Shaving, shaping wood |
| Chisel | 25, 30° | Easy (flat surfaces) | Joinery, carving |
| Plane Iron | 25, 30° | Easy (honing guides available) | Smoothing surfaces |
Troubleshooting: If Your Draw Knife Won’t Stay Sharp
Some woodworkers find their draw knife dulls quickly, even after careful sharpening. Possible reasons include:
- Poor steel quality: Low-quality blades don’t hold an edge well.
- Incorrect sharpening angle: Too shallow or inconsistent angles weaken the edge.
- Skipping grit levels: Moving from coarse to fine too quickly leaves the edge weak.
- Using the wrong sharpening tool: For example, using a file when only a stone is needed can damage the blade.
If you still have problems, consider having a professional assess your tool.
Resources For Further Learning
Sharpening skills improve with practice and study. Many online guides, videos, and books offer more detail. One valuable resource is the Wikipedia entry on drawknives, which covers tool history and design. Local woodworking clubs are also great places to learn from experienced users.
Frequently Asked Questions
How Often Should I Sharpen My Draw Knife?
The frequency depends on how much you use your draw knife and the type of wood you’re working with. For most hobbyists, sharpening every few weeks is enough. If you notice the tool is harder to push or leaves rough surfaces, it’s time to sharpen.
For professionals working with hard woods, sharpening may be needed daily.
Can I Use A Power Grinder To Sharpen My Draw Knife?
It’s possible but not recommended for most users. Power grinders remove metal quickly and can overheat the blade, ruining the temper and making it brittle. If you must use a grinder, keep the blade cool and use a light touch.
Most experts prefer hand stones for more control and less risk.
What’s The Difference Between Honing And Sharpening?
Sharpening removes metal to create a new edge, usually with coarse or medium stones. Honing refines and polishes the edge with fine stones or a strop. Regular honing keeps a sharp edge longer, reducing how often you need full sharpening.